
FluidNC Set Up and First Job
FluidNC Set Up and First Job
This guide is for every BlueCarve machine with a FluidNC controller (it has a FluidNC sticker on the black controller box) and the 7″ TouchBLUE tablet.
1. How it works: CAD, CAM, Control
Every job goes through the same three steps. The first two happen on a computer. The third happens at the machine, on the tablet.
Which programs to use, what they cost, how hard they are to learn and how to save G-code for FluidNC from each one: see Making G-code for your FluidNC CNC.
2. Check your tablet is up to date
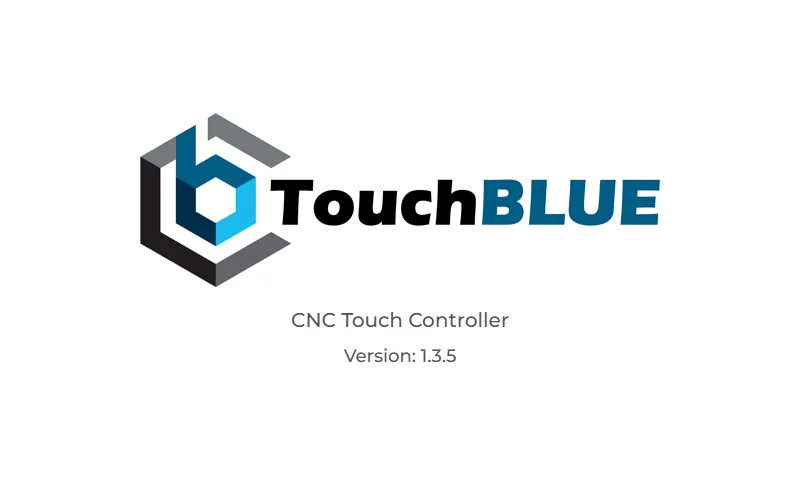
- Turn on the tablet. The version number shows on the first screen.

The start-up screen shows the version (here 1.3.5). - If your tablet shows a lower version number than 1.3.5, update it to the latest version: click Update the tablet below. If it shows the same number, it is up to date: go to section 3.
Update the tablet to version 1.3.5
- Use Chrome or Edge on a computer (Windows, Mac or Linux). Safari, Firefox and phones can’t do this.
- Connect the tablet’s USB-C port to the computer with a USB-C data cable (some cables only charge). The cable powers the tablet too.
- Close any other program that might be using the tablet’s USB connection.
- Click the button, pick the tablet’s port from the list, then choose Install.
- It takes two to three minutes. Don’t unplug the cable or close this page until it says it has finished. The tablet restarts by itself, and your settings stay as they are.
- The tablet isn’t in the port list, or it fails? Try another cable and another USB port (no hubs). On Windows the tablet may need its USB driver (CH340 or CP210x). It is safe to run the update again.
- The button doesn’t appear? Use the updater page at touchblue.pages.dev instead.
3. First-time set up
- Check the emergency stop is connected to the controller and released (twist it to release).
- Connect power to the controller using the 24 V power pack.
- If you intend to use them, connect and power the VFD (spindle) and the laser.
- Power the tablet (any USB wall adaptor and USB-C cable).
- The start-up screen shows for a few seconds, then the main screen opens and the tablet connects to the machine by itself. There is nothing to select.
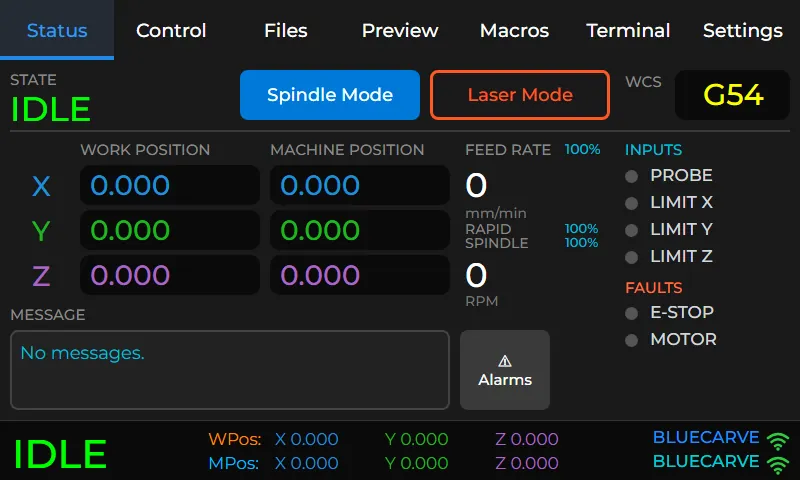
- When the word at the bottom left changes from a red OFFLINE to a green IDLE, the tablet is connected (this can take up to 30 seconds).
- If an ALARM message appears, tap Clear Alarm.
- If a gantry is resting against a sensor, the next steps will fail. Turn off the controller, push the gantry back off the sensor by hand, then power up again.
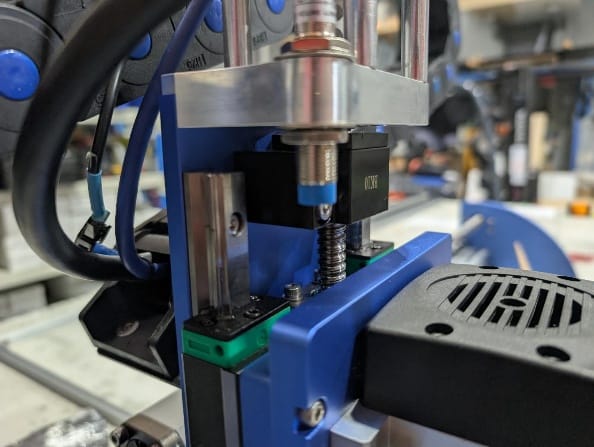
The Status tab. IDLE means connected and ready. Under INPUTS, the PROBE and LIMIT X, Y and Z lamps light up when that sensor is triggered. - Test the limit sensors. Hold a metal object against each sensor in turn. On the Status tab, the matching LIMIT X, LIMIT Y or LIMIT Z lamp under INPUTS should light up. If one doesn't light up, power off and check that sensor's connection.
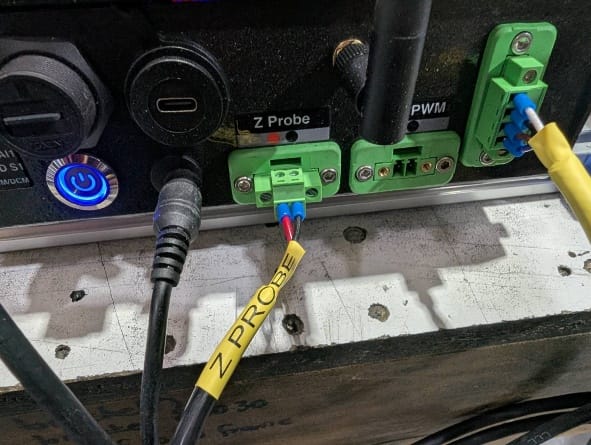
Y axis sensor X axis sensor Z axis sensor - Test the Z probe. Connect the probe and touch the clip to the probe plate. The PROBE lamp under INPUTS should light up.
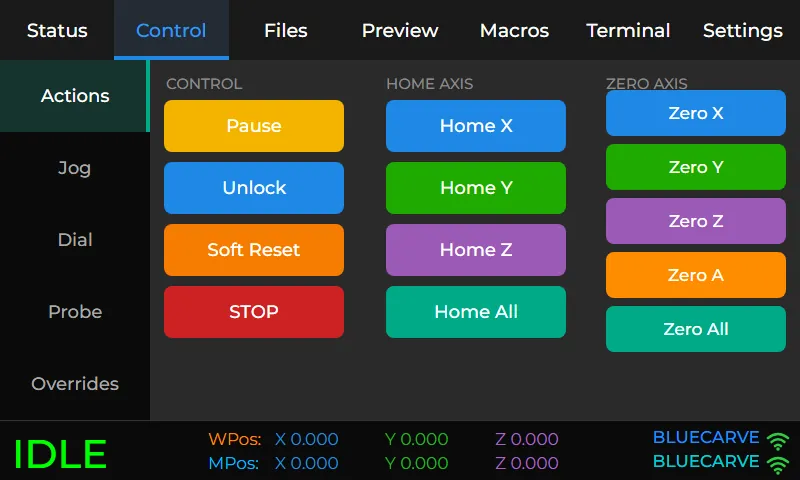
Touch the clip to the plate: the PROBE lamp lights up. - Home the machine. Clear the bed, go to Control > Actions and tap Home All. The state shows HOME while the machine moves to its sensors, then returns to IDLE.
Control > Actions: Home All is in the middle column.
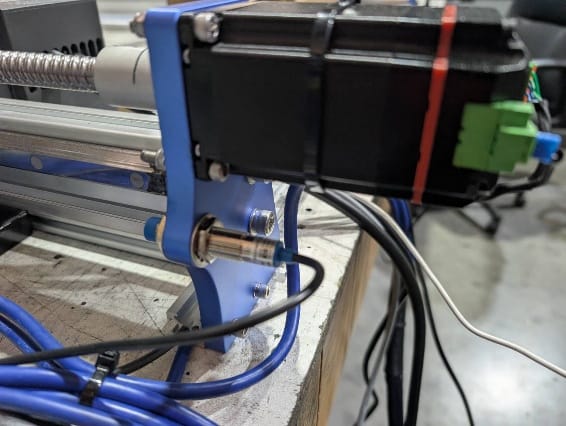
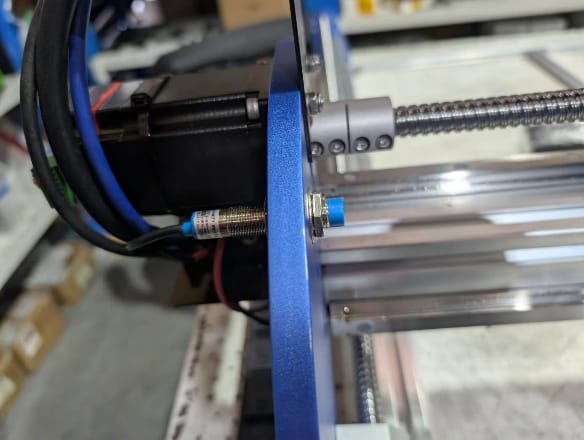
That completes the commissioning of your CNC. Next, make your first job file in Easel.
4. Your first job in Easel
Because Easel is free, let's carve something simple step by step: a name plaque, 180 x 100 mm, cut from 12 mm plywood. The name is engraved 2 mm deep, then the plaque is cut out with small holding tabs. It takes about 7 minutes on the machine, with one 3.175 mm (1/8") flat end mill.
You design in Easel on a computer, save the job as a G-code file, and run it from the tablet. Easel doesn't drive a FluidNC machine. Prefer another program? Making G-code for your FluidNC CNC compares Vectric, MillMage, Fusion, the tablet's Tools page and free options.
4.1 Create your Easel account
- Go to easel.com in Chrome or Edge and sign up with your email address.
- Easel emails you a confirmation link. Click it, then sign in.
4.2 Set up your machine in Easel (once)
- On the Getting Started page click Set up my CNC machine, then Start Machine Setup. (Later you'll find this under Machine > Set up new machine.)
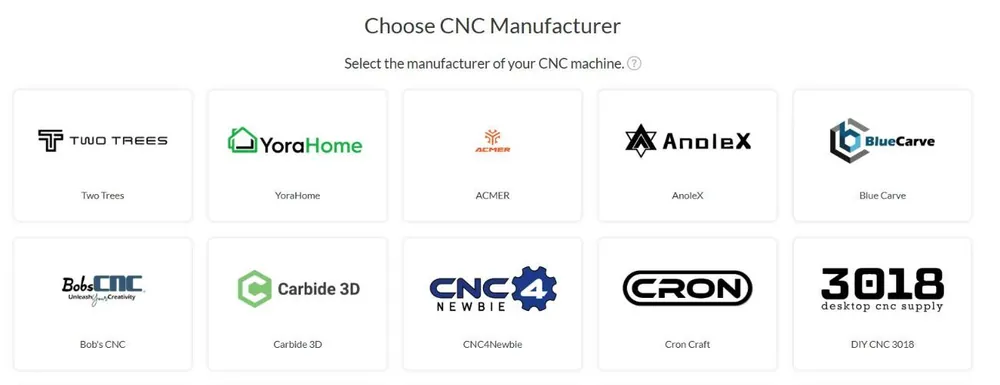
Easel's Getting Started page. - Choose Blue Carve as the manufacturer.
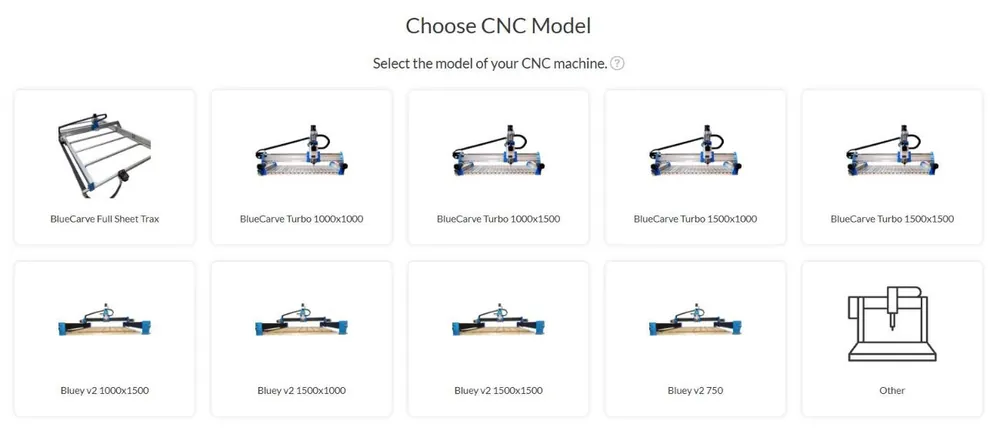
Blue Carve is in Easel's manufacturer list. - Choose Other (bottom right). Don't pick the Turbo, Trax or Bluey pictures: those profiles make Easel run the machine over USB, which is for the older Arduino controllers.
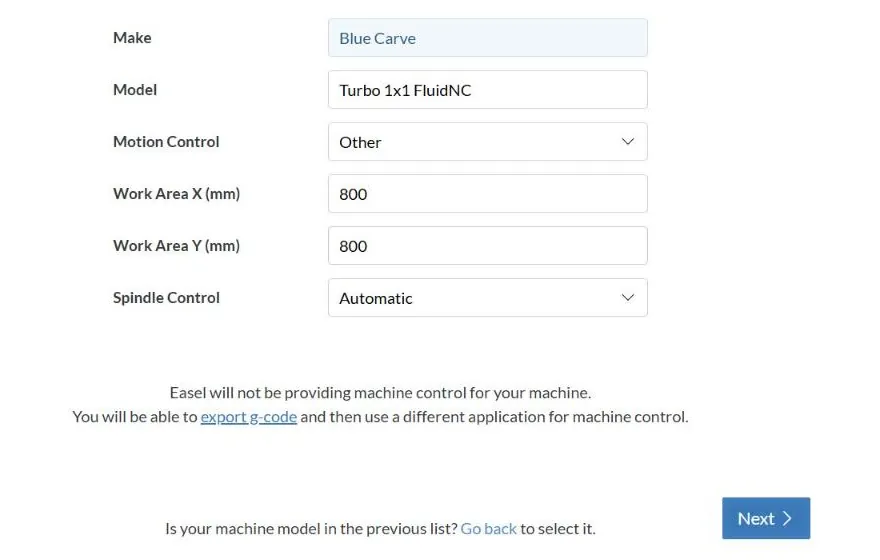
For a FluidNC machine, choose Other. - Fill in the details, then click Next:
Model Any name, for example Turbo 1x1 FluidNC Motion Control Other. Not "FluidNC (Beta)": that option is for Easel driving the machine over USB, and your machine is run from the tablet. Work Area X and Y (mm) Your machine's work area (table below) Spindle Control Automatic Machine Size Work area X Work area Y Turbo 1 x 1 800 800 Turbo 1 x 1.5 800 1300 Turbo 1.5 x 1 1300 800 Turbo 1.5 x 1.5 1300 1300 Trax 1.5 x 3.0 1270 2770 For other sizes, enter the furthest distance your machine can travel in X and Y.
Easel confirms it won't control the machine and that you can export G-code. That's what you want. - Click Return to Projects.

4.3 Design the plaque
- Click Start a new project, type a name (for example "Name plaque") and click Create.
- Switch Easel to millimetres: click the mm switch at the bottom left of the drawing.
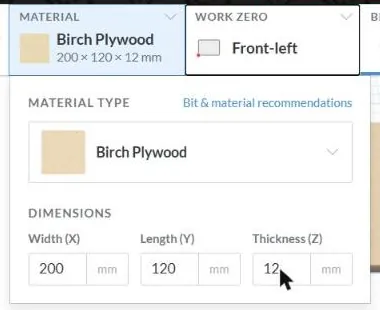
- Material. Click Material (top right), keep Birch Plywood, and set the size to 200 x 120 x 12 mm (measure your own board). Leave Work Zero on Front-left: on the machine you'll set zero at the front-left corner of the board, on top.
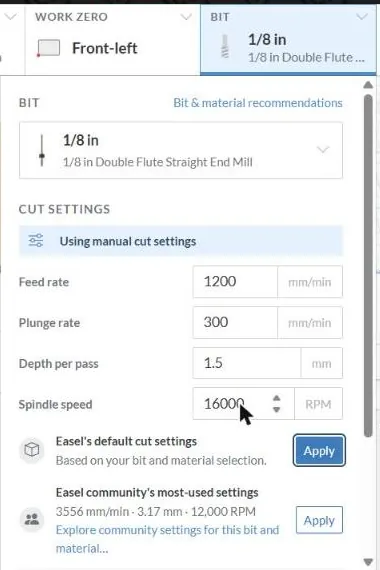
Material 200 x 120 x 12 mm, Work Zero Front-left. - Bit and speeds. Click Bit. Keep the 1/8 in straight end mill (3.175 mm) and set the cut settings: feed rate 1200 mm/min, plunge rate 300 mm/min, depth per pass 1.5 mm, spindle speed 16000 RPM. These are gentle starting values for plywood. feeds.endmill.com.au gives values for other bits and materials.
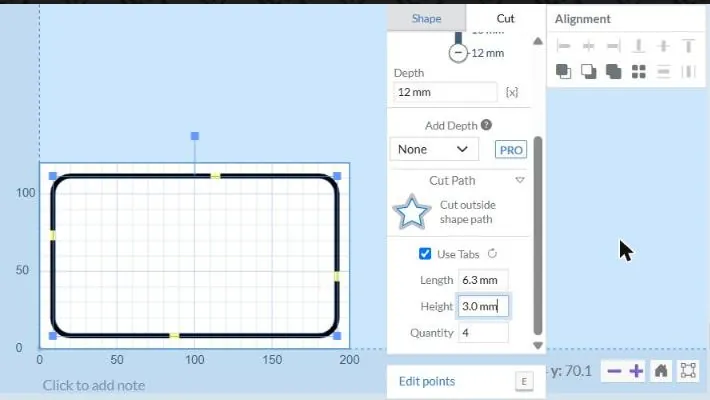
Cut settings for this job. - The outline. Click the Shapes tool (top of the left toolbar) and choose Square. In the Shape tab set width 180, height 100, X 10, Y 10 and corner radius 10 (X and Y). Then in the Cut tab:
- Depth: 12 mm (all the way through).
- Cut Path: Cut outside shape path.
- Use Tabs stays ticked: 4 tabs, height 3 mm. The tabs hold the plaque in the board until the end.
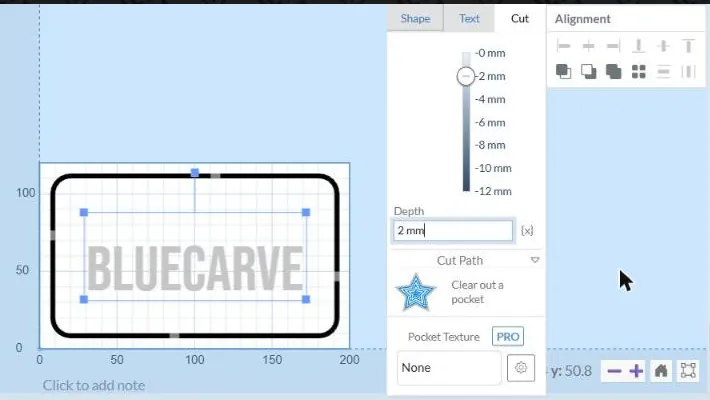
Outline: cut outside, 12 mm deep, 4 tabs (the yellow marks). - The name. Click the Aa (Text) tool and pick a font without a PRO badge, for example Bebas. Double-click the word TEXT on the drawing and type your name. In the Shape tab set width 140, height 53, X 30, Y 33.5 to centre it. In the Cut tab set depth 2 mm and keep Clear out a pocket.
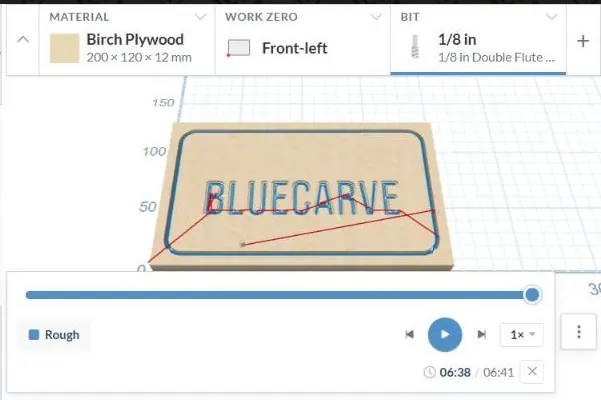
Text pocketed 2 mm deep. - Check it. Click Simulate (right side) and play it, or drag the slider to the end. Blue lines are cuts; red lines are moves between cuts. This job takes about 6 minutes 40 seconds.
The simulation shows the finished plaque before you cut anything.
4.4 Save the G-code
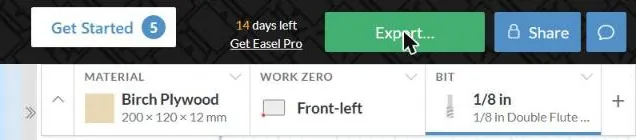
- Click the green Export… button (top right). Easel downloads the file straight away, named after the project, for example Name plaque.nc, into your Downloads folder. (Project > Download > Download g-code does the same.) On the free plan this uses your export for the week.
With a FluidNC ("Other") profile, Easel shows Export instead of Carve. - Copy the file to the microSD card with the card reader and put the card back in the controller. Or send it over WiFi: join the computer to the BLUECARVE network, open http://192.168.0.2 and drop the file on the page.
Easel's file works on the tablet as it is: it's in millimetres, turns the spindle on at 16000 RPM and has no tool number, so the tablet's job check passes in Spindle Mode.
4.5 Carve it
- Clamp the board on the machine. Keep the clamps outside the plaque outline: Easel lifts the bit only about 4 mm between cuts, so it won't clear a tall clamp.
- Fit the 1/8" (3.175 mm) end mill.
- On the tablet: Home All, make sure Spindle Mode is selected, then jog to the front-left corner of the board and tap Zero X and Zero Y.
- Probe the top of the board: Control > Probe > Z Probe (see section 5). Remove the clip and plate.
- Open Files, tap Refresh, preview Name plaque.nc with the blue eye, then press the green play button. Stay by the machine with the emergency stop in reach.
- When it finishes, cut through the 4 tabs with a sharp chisel or knife and sand the edges.
Easel's own help covers designing and exporting G-code.
5. Running a job from the tablet
The full tablet instructions are in the TouchBLUE tablet manual. The basic steps for every job:
- Turn on the CNC and connect the tablet (tap BLUECARVE).
- Insert the microSD card with your job into the controller.
- Home the machine: Control > Actions > Home All.
- Secure your material.
- Jog to your start position: Control > Jog (pick a step size and tap the arrows) or Control > Dial (turn a dial like a handwheel).
- Zero the axes: Control > Actions > Zero All (or each axis).
- Probe the top surface: attach the black clip to the bit, place the probe plate under the bit on the material, then go to Control > Probe and tap Z Probe. The machine lowers the bit onto the plate and sets Z zero, allowing for the 15 mm plate. Remove the clip and plate before you start.
- Start the job from the Files tab with the green play button. The tablet checks the file, then switches to the Status tab, which shows the progress.
Machine states
| State | Meaning |
|---|---|
| IDLE (green) | Ready for commands |
| RUN (cyan) | Running a job |
| JOG (cyan) | Jogging |
| HOLD (yellow) | Paused |
| ALARM (red) | Error: needs clearing |
| HOME (blue) | Homing |
Clearing an alarm
- When the ALARM popup appears, tap Clear Alarm and wait for IDLE.
- Or go to Control > Actions and tap Unlock. If needed, tap Soft Reset.
6. Keeping the tablet up to date
BlueCarve releases tablet updates from time to time. Every few months, turn on the tablet and check the version number on its first screen. If it is lower than the latest version (1.3.5), update the tablet with the updater in section 2. The TouchBLUE tablet manual has the full instructions for the tablet.
7. Troubleshooting
| Problem | Check |
|---|---|
| Tablet screen is blank | The tablet has no battery: check the USB adaptor is switched on, and try another USB-C cable. |
| The tablet stays OFFLINE (red) | Make sure the controller is powered (not just plugged in by USB) and wait about 30 seconds. Keep the tablet within a few metres of the controller. Restart the tablet. |
| "Machine was moving when it was stopped" or ALARM 3 after STOP | The position may be lost. Clear the bed, tap Home All, then set your zero again. |
| Status shows ALARM | Tap Clear Alarm, or Control > Actions > Unlock. |
| Homing fails straight away | A gantry may be resting on a sensor. Turn off the controller, push the gantry off the sensor, then try again. |
| A sensor light doesn't turn green | Power off and check that sensor's cable is fully plugged in at both ends. |
| The PROBE lamp doesn't light when you test the probe | Check the probe cable is plugged into the controller and the clip is clean. |
| Job file isn't listed | Check the microSD card is fully inserted in the controller and the file was exported as G-code. |
| All motors stop at once | A closed-loop motor fault. Find and clear the cause, then turn the controller off and on. |
Email adam@bluecarve.com.au with your machine model, size and a photo or short video of the problem. Owners also help each other in the BlueCarve owners group on Facebook.
Stuck on something? I'm Bingo. Answer a couple of questions and I'll point you to the fix.