
T-Slot Rail Installation
T-Slot Rail Installation
1. Overview
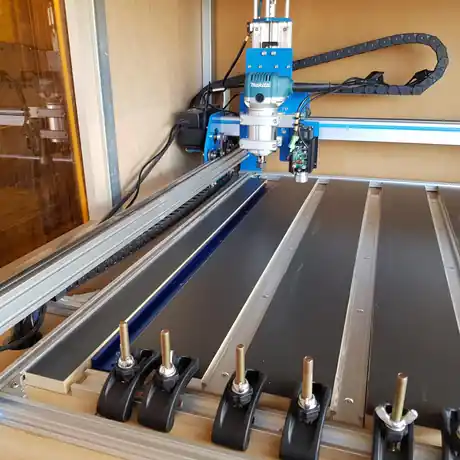
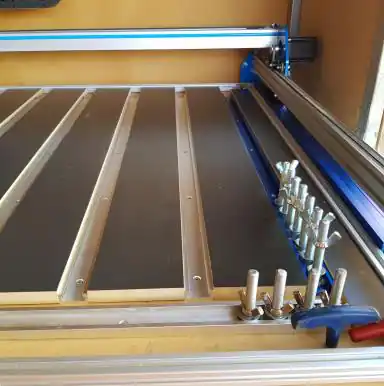
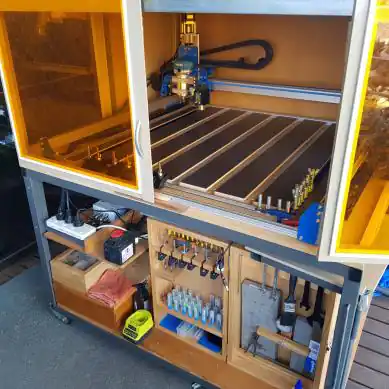
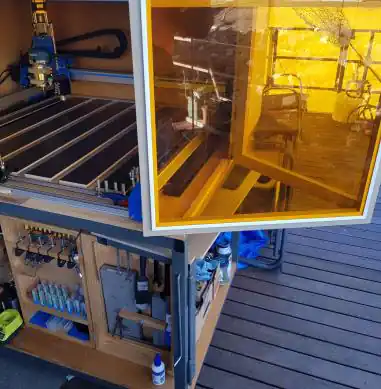
Aluminium T-slot rails screwed to the base, with loose MDF strips between them, give you a flat bed you can clamp work to anywhere. This is a tried and tested layout shared by BlueCarve owner Terry Brown, built for a Bluey 1000. The same method works for other machines and sizes: adjust the rail and strip lengths to suit your base.
Turbo and TraxIf your machine came with its own T-slot bed, follow the table and T-slot bed section in your machine’s set-up guide instead.
2. Materials
Quantities are for a Bluey 1000 on a 1200 x 1200 mm base.
| Item | Quantity | Notes |
|---|---|---|
| Aluminium T-slot rail, 30 x 12 mm, 800 mm long | 8 | 7 lengthways plus 1 across the front. From Adam’s Bits. |
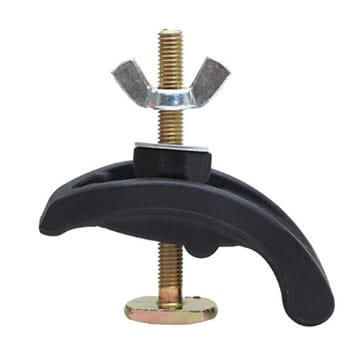
| T-slot clamps | 6 | From Adam’s Bits. |
| Additional aluminium corner brackets | As needed | From Adam’s Bits. |
| Base board: 18 mm MDF or structural board | 1 | 1200 x 1200 mm |
| Steel frame: 38 x 25 mm (1.6 mm wall) on castors | 1 | Support frame for the base |
| MDF strips, 16 mm (or 18 mm), 100 x 880 mm | 6 | Fit between the rails |
| MDF strips, 16 mm (or 18 mm), 50 x 880 mm | 2 | One each side, at the outer rails |
| Wood screws | As needed | To fix the base board and the rails |
3. Build a level base
- Build a 1200 x 1200 mm support frame from 38 x 25 mm steel on castors.
- Level the frame carefully.
Get this right firstLike the foundation of a house: if the frame isn’t level, you’ll be fighting it through the whole build and every job you cut.
- Screw the 18 mm MDF or structural board to the frame.
4. Fix the CNC to the base
- Remove the aluminium centre rail from the CNC.
- Sit the CNC square on the base.
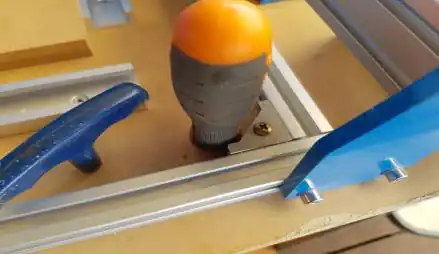
- Drill a hole in each corner bracket and screw the brackets to the base. Watch out for the other fixing screws as you drill.

Drill a hole in the corner bracket and fix it to the base.
5. Fit the rails and MDF strips
- Cut the MDF into strips: 6 at 100 x 880 mm and 2 at 50 x 880 mm (16 mm or 18 mm thick).
- Fit the first T-slot rail parallel to the CNC’s side rail and screw it to the base. Measure accurately: this is very important, because every other rail lines up from this one.
- Lay a 50 mm strip on the base and push it up against the first rail.
- Fit the next rail hard against the MDF strip and screw it down. Then lay a 100 mm strip, fit the next rail, and so on across the base.
- Finish with the second 50 mm strip at the far side.
- Fit one rail across the front of the base.
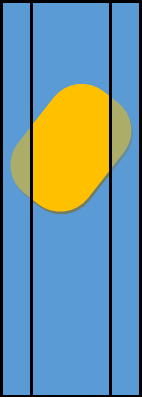
- Leave the MDF strips loose. Your clamps hold them in place, and you can lift them out to clean underneath or replace one when it’s worn.
6. Tips
- Fixing the rails straight to the main base, rather than to a raised top, gives you more usable height under the router.
- You can make the top bigger if you like. This layout was the most practical of several Terry tried.
- Keep the underside of the MDF strips and the base clean, so the strips sit flat.
- Resurface the strips with a surfacing bit when they get chewed up, or simply replace them.
7. Troubleshooting
| Problem | Check |
|---|---|
| Cut depth varies across the bed | Check the frame is level, then resurface the MDF strips so the bed is flat to the machine. |
| A strip rocks or sits high | Lift it out and clean any chips from underneath and from the base. |
| Strips are tight or won’t fit between rails | A rail isn’t parallel. Re-measure from the first rail and adjust. |
| Not enough clearance under the router | Fit the rails straight to the main base rather than to a raised top, as shown here. |
Need help?
Email adam@bluecarve.com.au with your machine model, size and a photo of your base. Owners also help each other in the BlueCarve owners group on Facebook.
Email adam@bluecarve.com.au with your machine model, size and a photo of your base. Owners also help each other in the BlueCarve owners group on Facebook.
Stuck on something? I’m Bingo. Answer a couple of questions and I’ll point you to the fix.
BingoBlueCarve troubleshooting helper
Still stuck? adam@bluecarve.com.au